 Save to Pinterest
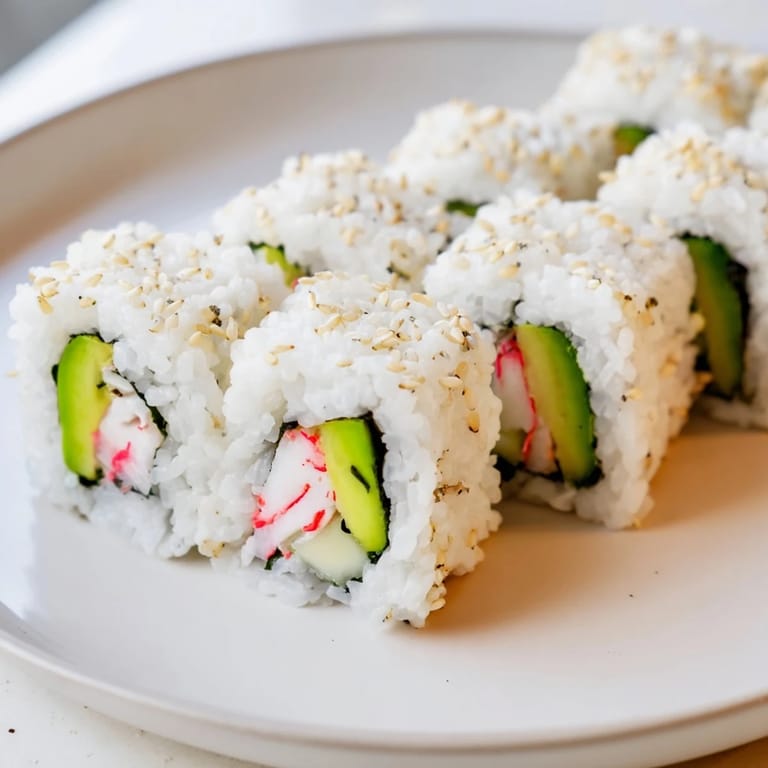
 I discovered California rolls not in California, but in a cramped sushi spot downtown where my coworker insisted they were "the gateway sushi." She was right. There's something almost cheeky about this American invention masquerading as traditional Japanese food, but that's exactly why it clicked with me—it's approachable, forgiving, and honestly just delicious. The first time I made them at home, I was terrified of the rolling part, but it turned out to be one of those kitchen skills that feels impossible until suddenly it isn't.
I remember rolling these for a potluck and watching people's faces light up when they realized I'd made sushi in my tiny kitchen. Someone asked if I'd trained in Japan, and I had to laugh—the secret was just patience and a bamboo mat. That moment taught me that the best meals are the ones you make with your own two hands, imperfections and all.
Ingredients
- Sushi rice (1 ½ cups): This isn't regular rice—it's the foundation of everything. Look for actual sushi rice at the store; it has the right starch content to hold its shape. Rinsing it thoroughly removes excess starch so each grain stays distinct.
- Rice vinegar (2 ½ tbsp), sugar (1 tbsp), and salt (¾ tsp): These three ingredients transform plain rice into something with personality. The vinegar gives it that signature tang while the sugar balances it out.
- Crabmeat or surimi (120 g): Real crab is luxurious if your budget allows it, but imitation crab works beautifully here—honestly, most people can't tell the difference in a roll.
- Avocado (1 ripe one): The creamy texture is what makes California rolls special. Pick one that yields slightly to pressure but isn't mushy, and slice it right before rolling so it doesn't oxidize.
- Cucumber (½ one): Peel and seed it for a crisp bite that doesn't add too much moisture. This is where precision actually matters.
- Nori (4 sheets): Buy quality seaweed sheets—the thicker ones are easier to work with. Store them in an airtight container so they stay crispy.
- Sesame seeds (2 tbsp, toasted): Toasting them yourself is worth it for the flavor boost, but store-bought works fine too.
Tired of Takeout? 🥡
Get 10 meals you can make faster than delivery arrives. Seriously.
One email. No spam. Unsubscribe anytime.
Instructions
- Start with Perfect Rice:
- Rinse your sushi rice under cold running water, stirring gently with your fingers until the water runs clear—this takes patience but pays off. Combine with water in a saucepan, bring to a boil, then immediately reduce heat to low, cover, and let it steam for exactly 15 minutes without peeking.
- Season the Rice:
- While the rice is still warm, gently fold in the vinegar-sugar-salt mixture using a wooden spoon in a cutting motion rather than stirring—you're trying to coat each grain without crushing it. Let it cool to room temperature; warm rice will make your nori soggy, so don't skip this step.
- Set Up Your Rolling Station:
- Place your bamboo mat on a clean surface and cover it with plastic wrap to prevent sticking. Position a sheet of nori shiny side down on the mat, and have a small bowl of water ready for your hands.
- Spread the Rice:
- Wet your hands with water (this is crucial—it keeps the rice from sticking to your fingers), then press about ¾ cup of rice evenly across the nori, leaving a 2 cm border at the top. Sprinkle sesame seeds over the rice layer and press them in gently.
- The Flip:
- Here's the magic move: carefully flip the entire mat so the rice side is now facing down and the nori is facing up. It feels weird the first time but gets easier with practice.
- Add Your Fillings:
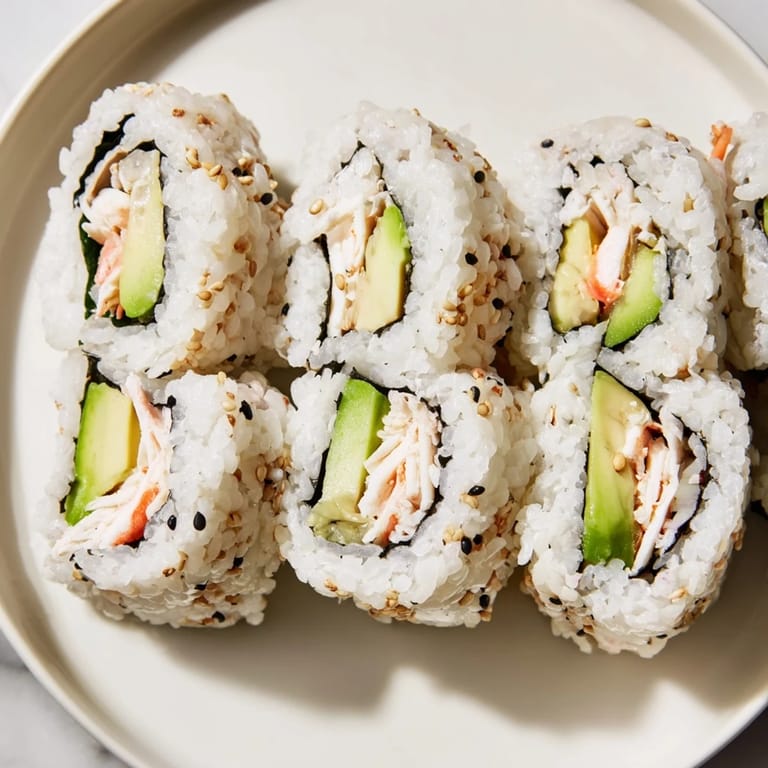
- Along the bottom third of the nori, arrange a line of shredded crab, avocado strips, and cucumber strips—don't overstuff or the roll will burst. If you're using mayo, add just a thin drizzle along the fillings.
- Roll Tight and Seal:
- Using the mat, roll the nori away from you in one confident motion, pressing gently to shape the roll as you go. Once you've rolled it tightly, wet your finger and run it along the top edge of the nori, then press to seal.
- Slice with Purpose:
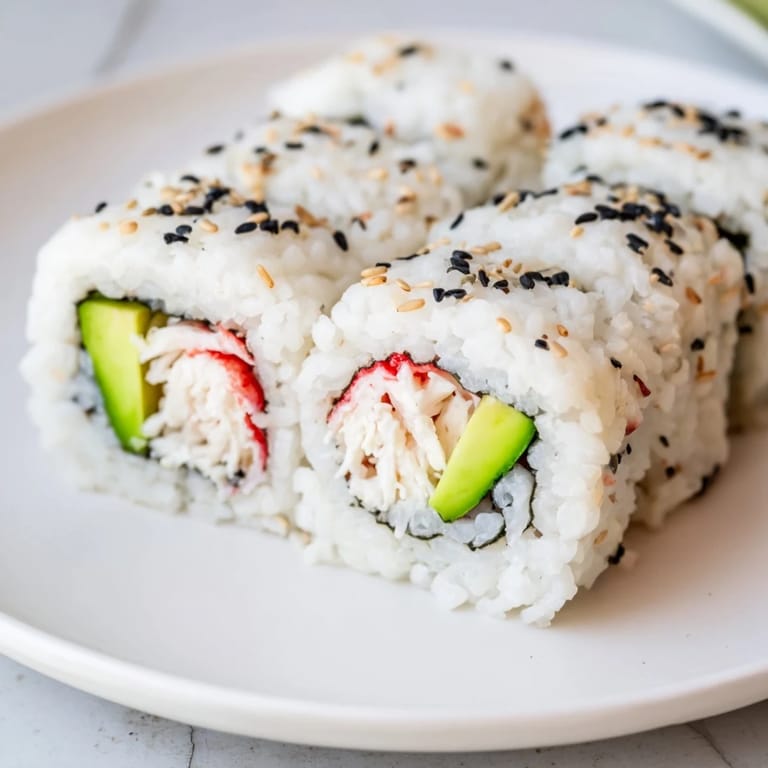
- Using a very sharp, damp knife, slice the roll into 6 even pieces with one smooth motion for each cut rather than sawing—wet your knife between cuts to keep it clean. Repeat with the remaining ingredients.
 Save to Pinterest
 My roommate took one bite of my homemade California roll and immediately ordered ingredients to make them herself. We spent a whole Saturday afternoon rolling sushi and laughing at our wonky first attempts, and somewhere between the third and fourth batch, we both stopped overthinking it and just let our hands do the work. That's when I realized these rolls aren't complicated—they just need confidence.
The Rice is Everything
I used to think sushi was all about the fillings, but the truth is the rice carries the whole dish. The seasoning needs to be balanced—too much vinegar and it tastes sour, too little and it's bland and forgettable. That vinegar-sugar-salt combination might seem simple, but it's what separates homemade sushi from something that tastes like it came from a grocery store bin. Once you nail the rice, everything else falls into place.
Why the Flip Matters
The first few times I made California rolls, I tried assembling them rice-side up and it was a disaster—the fillings would slide around and nothing held together properly. Then I remembered that California rolls are actually an inside-out roll, which is why you flip it. Once I got that, the whole technique suddenly made sense. It's one of those small details that seems obvious once you understand it but can derail you if you miss it.
Make Them Your Way
The beauty of California rolls is that they're forgiving enough to adapt to what you have or what you love. I've made versions with roasted red pepper instead of cucumber, added a tiny bit of sriracha to the mayo for heat, and even tried using seared tuna once just to see what would happen. Each version taught me something about how the flavors work together. The structure stays the same but the possibilities are honestly endless.
- For a spicy version, mix a little sriracha into the mayo—it adds a kick without overpowering the delicate flavors.
- If you're short on time, buy pre-cooked sushi rice from an Asian market and skip the cooking step entirely.
- Practice your knife work by slicing soft fruits and vegetables before tackling the actual rolls—confidence is half the battle.
 Save to Pinterest
 California rolls taught me that you don't need to be a trained sushi chef to make something that tastes like it came from a restaurant. With a little practice and the right technique, you can create something delicious in your own kitchen that's better than takeout because it's made with care.
Recipe FAQs
- → What type of crab is best for the roll?
Cooked crabmeat or imitation crab (surimi) both work well, offering sweet, tender flavors that pair nicely with avocado and cucumber.
- → How do I prepare sushi rice properly?
Rinse rice until water runs clear, simmer with water, then season with rice vinegar, sugar, and salt for balanced flavor and texture.
- → Can I substitute ingredients for a vegetarian option?
Replace crab with extra avocado, cucumber, or tofu to maintain freshness and texture while keeping it plant-based.
- → What tools are necessary for rolling?
A bamboo sushi rolling mat, sharp knife, and plastic wrap help achieve tight, even rolls with clean slices.
- → How should the roll be served?
Slice into pieces and serve with soy sauce, pickled ginger, and wasabi to complement the flavors and add variety.
- → Is sesame seed garnish optional?
Toasted sesame seeds add a nutty crunch and visual appeal but can be omitted if preferred.